App Development: 10 Best Bug & User Tracking Tools

Although bug tracking is one of the most important tasks when your app is still in the development phase, issues may still rise in the production phase after your app went online. In the "bug-collecting" process, it can also be useful to enable your users to give you instant feedback, or allow them to ask questions in case they don’t understand how your app works.

Luckily, these days there are many great bug and user tracking tools you can use to quickly fix issues in your app, shortly after they arise. With this post, we intend to provide you with a collection of powerful tools that enable you to effectively collect and manage bugs.

This is done either by collecting them directly from your users or team members, or by understanding how people use your app from monitoring their behaviour. Doing so not only eliminates bugs, but also improves user experience, and increases customer satisfaction.
1. Bugherd

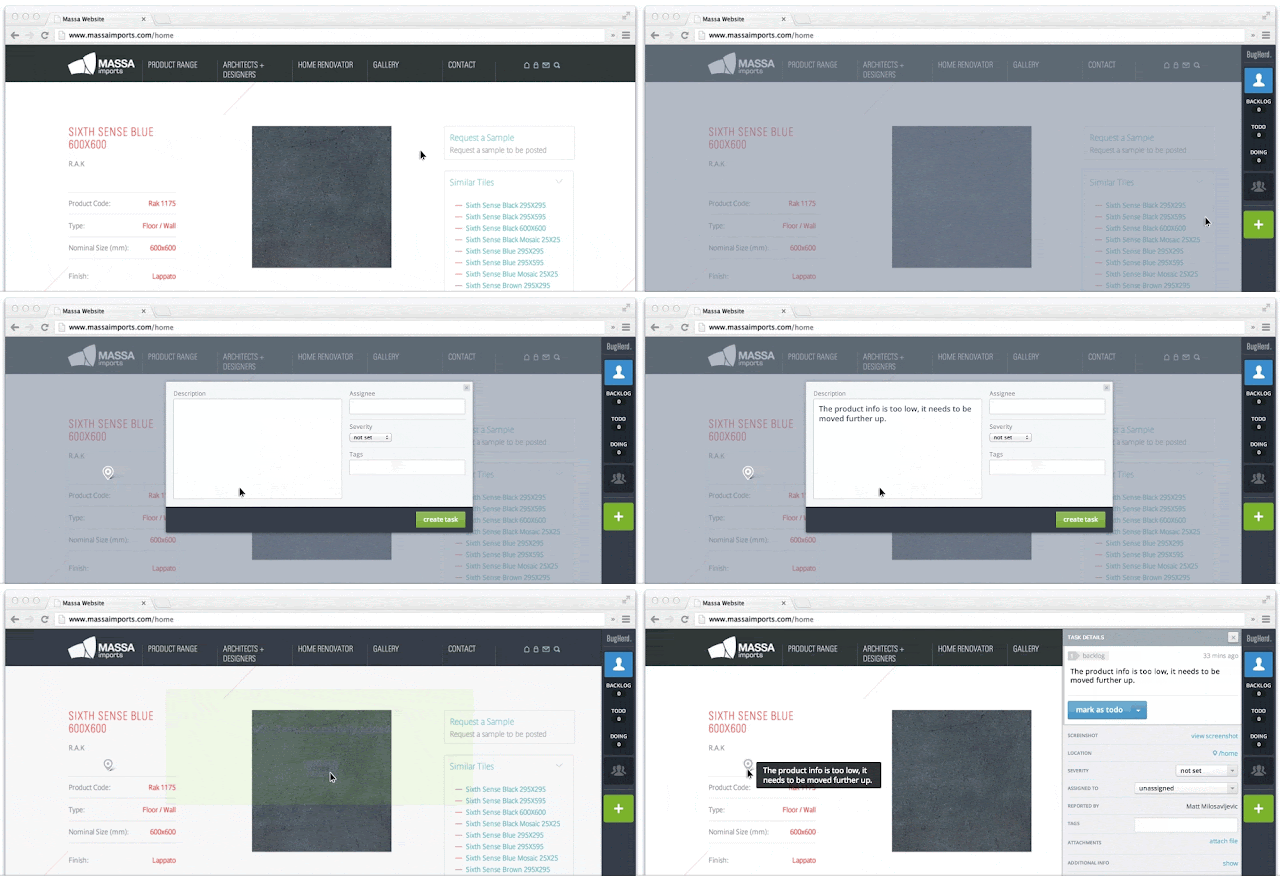
Do your clients need to fill out lengthy forms on your site, or create annotated screengrabs just to report a bug? With Bugherd, you can free them from this burden. It allows you to embed feedback directly into a website, so bugs can be flaged and managed visually. When your clients report their issues by making annotations right on your site, Bugherd turns them into a full report you can use to quickly fix the problem.


Your users only need to use a guest access then point, check, and describe the bug they found in your app to generate a report. Bugherd can also be integrated with many popular apps, such as Jira, Basecamp, or Zapier. Apart from client feedback, Bugherd also provides you with team collaboration and task management tools.
2. Doorbell

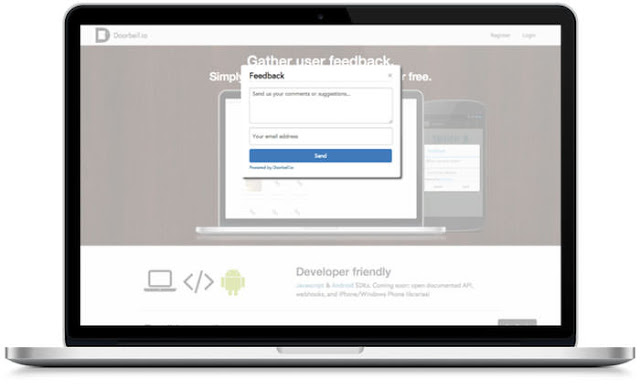
Doorbell helps you gather in-app user feedback on websites, iOS and Android apps for free. All feedback that have been received will be automatically tagged by sentiment analysis, and classified as positive or negative. You can also create your own tags for grouping messages, and perform text searches across all your messages.


Doorbell is already integrated with Pivotal Tracker, Asana, Jira, and many other project management and issue tracking tools. You only need to send the feedback coming from your customer straight to the project management system or issue tracking app you use. You can use JavaScript, iOS, and Android SDKs to set up Doorbell in your app.
3. Usersnap

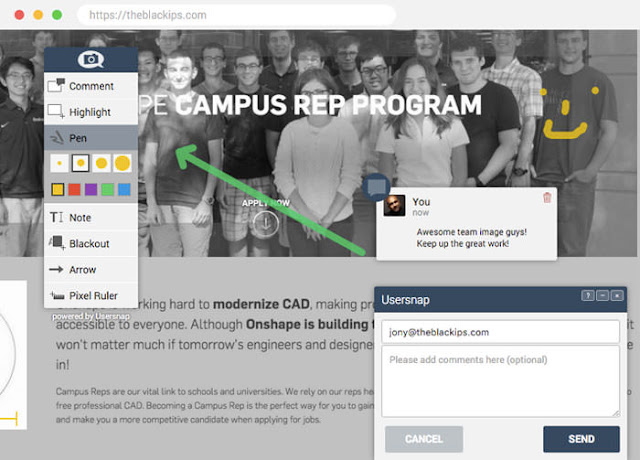
Usersnap will provide anyone who works on a web project with a handy visual bug tracker. Usersnap can even be your central place to organize feedback and collect bug reports. It gives your users the power to report bugs where they happen with point-and-click annotation tools and without the need to switch to a bug reporting app or form.


Usersnap will follow your own working style whether you use Agile methods, Scrum, or Waterfall development. This app also works with the tools you already use such as Slack, Asana, Zendesk, etc. You will also be assisted in organizng communication among designers, developers, the quality assurance team, and your customers.
4. Taperecorder

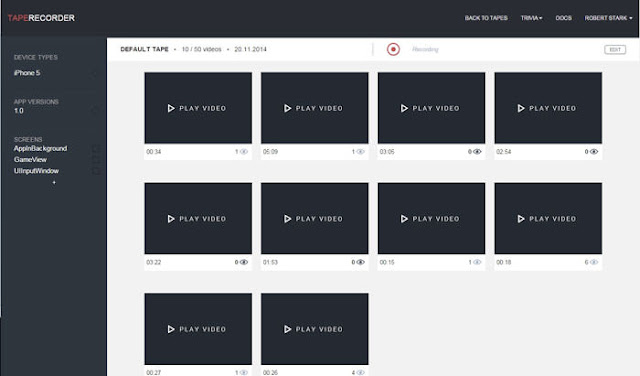
Taperecorder is an SDK (software development kit) that allows you to record videos about what users are doing in your app. You will be able to track, analyze, and enhance the numerous ways people use your product. Taperecorder automatically collects events you are tracking with your analytics, and displays them next to the video.


This app also gives attention to user privacy with automatically pixelate sensitive information. Just select what you want to record, and only watch videos that matter to you. Taperecorder is available for iPhone and Android, and its SDK is compatible with Apple’s App Store review guidelines as well.
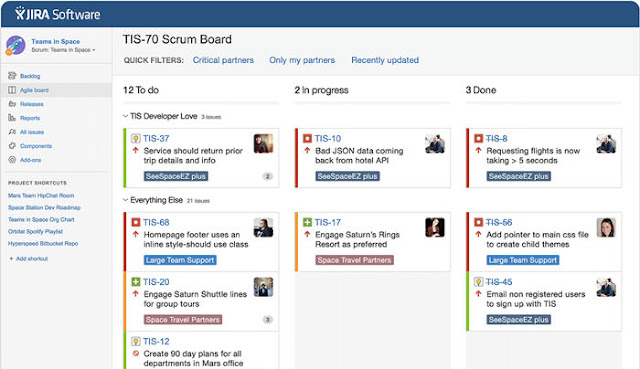
5. Jira

Jira is a popular development tool for Agile teams to plan and build great products by closely following issues and the whole development process. Jira is a complex software with features like flexible planning, accurate estimations, value driven prioritization, transparent execution, actionable result, and scalable evolution. Jira can be used to organize issues, assign work, follow team activity, and many others.


You can also use it to improve your team’s performance based on the real time visual data you get as reports and you can enhance Jira with add-ons as well. Moreover, you can integrate it with tools you already use, such as Confluence, Bitbucket, Hipchat, and others. After the 7-day free trial, it is available for $10 month for a small team and $75 for a growing team.

6. Rollbar

Rollbar helps you find errors in your web app fast, and you can fix them even before they happen. The app will quickly point the errors by collecting a wide variety of context data, including detailed stack traces, request parameters, URLs, environments, affected users and more. The errors will be grouped by root causes, so you can easily see what really happens inside your app.


Error alert notifications can be easily set up through email or third-party services such as Slack or HipChat. Rollbar works with many major languages and frameworks. It provides libraries for Ruby, Python, PHP, Node.js, JavaScript, Android, iOS, and Flash. You can also integrate it with your own system using the Rollbar RESTful API.
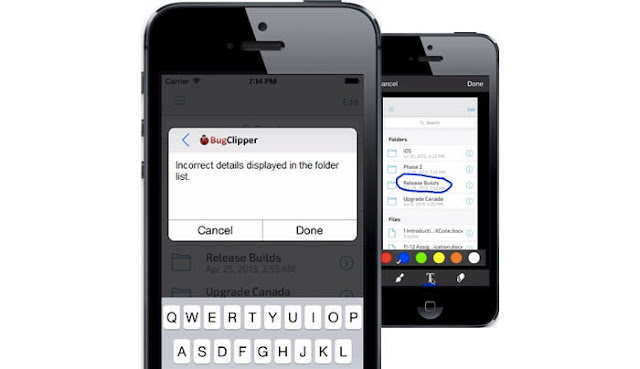
7. Bugclipper

Bugclipper is an in-app bug reporting tool that makes reporting a bug as simple as sending a text message. Users can choose from 3 methods to report bugs: screenshots, screen recordings, or crash videos. Bugclipper makes it possible to easily record what exactly is happening on the screen. Users just need to tap to capture the screen, describe the issue, and they’re done.


Bugclipper sends the issues caught from users to its dashboard in real-time. The dashboard allows you to manage all issues of your mobile app, track progress, and keep your team informed, all from the same place.
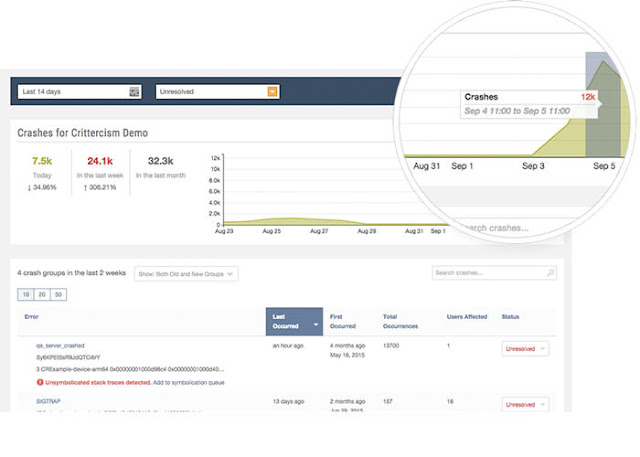
8. Apteligent

Apteligent is a powerful development management tool for enterprise mobile teams, that connects user insight with actionable field intelligence. It helps you get real-time visibility in each phase of the mobile app development process, allowing you to prioritize and summarize problems, and identify issues before they affect users by setting alerts. With Apteligent’s unique release console you can also monitor the adoption and stability of your latest release.


Based on users’ location, you will also gain insight into how to further optimize your app based on user-specific environmental data, such as country, carrier, device connectivity, and others. Apteligent has support for Android, Windows 10, and HTML5 and can be integrated with popular developer frameworks, such as Unity, PhoneGap, and Xamarin.
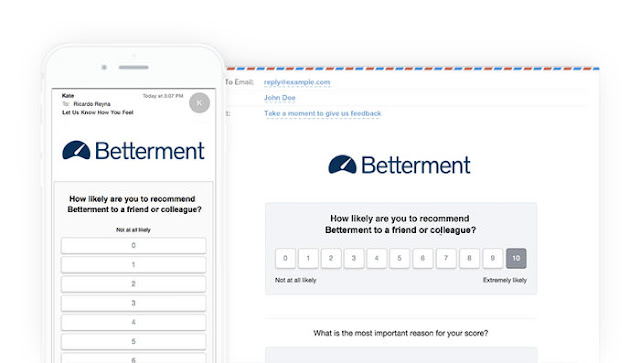
9. Promoter.io

Promoter empowers you to capture customer feedback, and analyze their responses by using the Net Promoter Campaigns feature. By using its web-based plaform you can easily build and manage user feedback campaigns using customized emails, perform deep analysis on customer feedback, and manage customer contacts.


The clear actionable insights of the Net Promoter System makes it obvious where to take action to get immediate and measurable growth. With Promoter, you don’t need to use multiple systems to engage customers effectively and increase their loyalty.
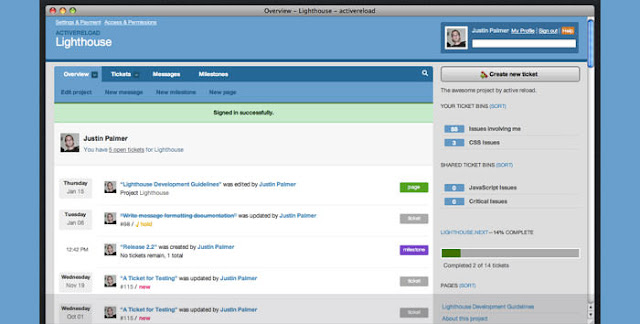
10. Lighthouse

Lighthouse is a simple issue tracking tool that will assist in keeping track of project development. Lighthouse will facilitate team collaboration, and keep you focused on your important tasks. Lighthouse makes it easy to create and tag issues, and automatically categorizes them behind the scenes. It is integrated with the Tender customer support service that will enable your staff to directly create new Lighthouse tickets.


You can also create and reply to tickets right from your email inbox. All the statuses of all your projects can be seen in a simple overview, and followed along with feeds. You can set milestones to plan features and establish release dates or attach documents or images directly to tickets so that anyone on your team can easily find them.

Source: http://www.hongkiat.com/blog/bug-user-tracking-reporting-app-development/

Understand Android Activity's launchMode

Activity is the most used component in Android. It is made to work in different purpose and the way it is launched is also very important. In this article, I want to talk about launchMode, which defines the way we start an activity.
This block will cover 4 items: standard, singleTop, singleTask and singleInstance. Let's start !

Assign a launchMode

Basically we could assign a launchMode directly as an attribute of <activity>tag inside AndroidManifest.xml file list this:
 <activity 
       android:name=".SingleTaskActivity" 
       android:label="singleTask launchMode" 
       android:launchMode="singleTask">  

standard

This is the default mode.

The behavior of Activity set to this mode is a new Activity will always be created to work separately with each Intent sent. Imagine, if there are 10 Intents sent to compose an email, there should be 10 Activities launch to serve each Intent separately. As a result, there could be an unlimited number of this kind of Activity launched in a device.

Behavior on Android pre-Lollipop

This kind of Activity would be created and placed on top of stack in the same task as one that sent an Intent.


An image below shows what will happen when we share an image to a standard Activity. It will be stacked in the same task as described although they are from the different application.


And this is what you will see in the Task Manager. (A little bit weird may be)


If we switch the application to the another one and then switch back to Gallery, we will still see that standard launchMode place on top of Gallery's task. As a result, if we need to do anything with Gallery, we have to finish our job in that additional Activity first.

Behavior on Android Lollipop

If those Activities are from the same application, it will work just like on pre-Lollipop, stacked on top of the task.


But in case that an Intent is sent from a different application. New task will be created and the newly created Activity will be placed as a root Activity like below.


And this is what you will see in Task Manager.


This happens because Task Management system is modified in Lollipop to make it better and more make sense. In Lollipop, you can just switch back to Gallery since they are in the different Task. You can fire another Intent, a new Task will be created to serve an Intent as same as the previous one.


An example of this kind of Activity is a Compose Email Activity or a Social Network's Status Posting Activity. If you think about an Activity that can work separately to serve an separate Intent, think about standard one.

singleTop

The next mode is singleTop. It acts almost the same as standard one which means that singleTop Activity instance could be created as many as we want. Only difference is if there already is an Activity instance with the same type at the top of stack in the caller Task, there would not be any new Activity created, instead an Intent will be sent to an existed Activity instance through onNewIntent() method.


In singleTop mode, you have to handle an incoming Intent in both onCreate() and onNewIntent() to make it works for all the cases.

A sample use case of this mode is a Search function. Let's think about creating a search box which will lead you to a SearchActivity to see the search result. For better UX, normally we always put a search box in the search result page as well to enable user to do another search without pressing back.

Now imagine, if we always launch a new SearchActivity to serve new search result, 10 new Activities for 10 searching. It would be extremely weird when you press back since you have to press back for 10 times to pass through those search result Activities to get back to your root Activity.

Instead, if there is SearchActivity on top of stack, we better send an Intent to an existed Activity instance and let it update the search result. Now there will be only one SearchActivity placed on top of stack and you can simply press just back button for a single time to get back to previous Activity. Makes a lot more sense now.

Anyway singleTop works with the same task as caller only. If you expect an Intent to be sent to an existed Activity placed on top of any other Task, I have to disappoint you by saying that it doesn't work that way. In case Intent is sent from another application to an singleTop Activity, a new Activity would be launched in the same aspect as standard launchMode (pre-Lollipop: placed on top of the caller Task, Lollipop: a new Task would be created).

singleTask

This mode is quite different from standard and singleTop. An Activity with singleTask launchMode is allowed to have only one instance in the system (a.k.a. Singleton). If there is an existed Activity instance in the system, the whole Task hold the instance would be moved to top while Intent would be delivered through onNewIntent() method. Otherwise, new Activity would be created and placed in the proper Task.

Working in the same application

If there is no that singleTask Activity instance existed in the system yet, new one would be created and simply placed on top of stack in the same Task.


But if there is an existed one, all of Activities placed above that singleTask Activity would be automatically and cruelly destroyed in the proper way (lifecycle trigged) to make that an Activity we want to appear on top of stack. In the mean time, an Intent would be sent to the singleTask Activity through the lovely onNewIntent() method.


Doesn't make a good sense in term of user experience but it is designed this way ...
You may notice one thing that it is mentioned in document that
The system creates a new task and instantiates the activity at the root of the new task. 
But from the experiment, it doesn't seem to work as described. A singleTask Activity still stack up on top of the Task's Activity stack as we can see from what dumpsys activity command shows up.
 Task id #239 
  TaskRecord{428efe30 #239 A=com.thecheesefactory.lab.launchmode U=0 sz=2} 
  Intent { act=android.intent.action.MAIN cat=[android.intent.category.LAUNCHER] flg=0x10000000 cmp=com.thecheesefactory.lab.launchmode/.StandardActivity } 
   Hist #1: ActivityRecord{429a88d0 u0 com.thecheesefactory.lab.launchmode/.SingleTaskActivity t239} 
    Intent { cmp=com.thecheesefactory.lab.launchmode/.SingleTaskActivity } 
    ProcessRecord{42243130 18965:com.thecheesefactory.lab.launchmode/u0a123} 
   Hist #0: ActivityRecord{425fec98 u0 com.thecheesefactory.lab.launchmode/.StandardActivity t239} 
    Intent { act=android.intent.action.MAIN cat=[android.intent.category.LAUNCHER] flg=0x10000000 cmp=com.thecheesefactory.lab.launchmode/.StandardActivity } 
    ProcessRecord{42243130 18965:com.thecheesefactory.lab.launchmode/u0a123} 
If you wish to to let a singleTask Activity acts like described in document: create a new Task and put an Activity as a root Activity. You need to assign taskAffinity attribute to the singleTask Activity like this.
 <activity 
       android:name=".SingleTaskActivity" 
       android:label="singleTask launchMode" 
       android:launchMode="singleTask" 
       android:taskAffinity="">

This is a result when we try to launch SingleTaskActivity.


It's your job to consider whether to use taskAffinity or not by the behavior of the Activity.

Collaborate with another application

Once an Intent is sent from another application and there is no any Activity instance created in the system yet, new Task would be created with a newly created Activity placed as a root Activity.


Unless there is a Task of the application that is an owner of the calling singleTask Activity existed, a newly created Activity would be placed on top of it instead.


In case that there is an Activity instance existed in any Task, the whole Task would be moved to top and every single Activity placed above the singleTask Activity will be destroyed with lifecycle. If back button is pressed, user has to travel through the Activities in the stack before going back to the caller Task.


A sample use case of this mode is any Entry Point Activity for example Email Client's Inbox page or Social Network's Timeline. Those Activities are not designed to have more than one instance so singleTask would do a job perfectly. Anyway you have to use this mode wisely since Activities could be destroyed without user's acknowledgement in this mode like described above.

singleInstance

This mode is quite close to singleTask, only single instance of Activity could be existed in the system. The difference is Task hold this Activity could have only one Activity, the singleInstance one. If another Activity is called from this kind of Activity, a new Task would be automatically created to place that new Activity. Likewise, if singleInstance Activity is called, new Task would be created to place the Activity.

Anyway the result is quite weird. From the information provided by dumpsys, it appears that there are two Tasks in the system but there is only one appeared in Task Manager depends on which is latest one that is moved to top. As a result, although there is a Task that is still working in the background but we couldn't switch it back to foreground. Doesn't make any sense at all.

This is what that happened when singleInstance Activity is called while there already is some Activity existed in the stack.


But this is what we see from Task Manager.


Since this Task could has only one Activity, we couldn't switch back to Task #1 anymore. Only way to do so is to relaunch the application from launcher but it appears that the singleInstance Task would be hidden in the background instead.

Anyway there is some workaround for the issue. Just like we did with singleTask Acvity, simply assign a taskAffinity attribute to the singleInstance Activity to enable multiple Tasks on Task Manager.
 <activity 
       android:name=".SingleInstanceActivity" 
       android:label="singleInstance launchMode" 
       android:launchMode="singleInstance" 
       android:taskAffinity=""> 
It makes more sense now.


This mode is rarely used. Some of the real use case is an Activity for Launcher or the application that you are 100% sure there is only one Activity. Anyway I suggest you not to use this mode unless it is really necessary.

Intent Flags

Beside from assigning the launch mode directly in AndroidManifest.xml, we are also able to assign more behavior through thing called Intent Flags, for example:
 Intent intent = new Intent(StandardActivity.this, StandardActivity.class); 
 intent.addFlags(Intent.FLAG_ACTIVITY_SINGLE_TOP); 
 startActivity(intent); 
would launch a StandardActivity with singleTop launchMode condition.

There are quite a lot of Flags you can play with. You could find more about it at Intent.

Source: https://inthecheesefactory.com/blog/understand-android-activity-launchmode/en

9 More Essential Plugins for Android Studio

Hi everyone, I'm Alex.
After install Android Studio successfully, we need some plugins to speed our code :) I found an article talk about 9 Essential Plugins very helpful for us.
This article consists following items:
1. Generate Parcelable Objects (*)
2. ADB Commands (*)
3. ADB over Wifi
4. Minimap 
5. Convert SVG to Android Vectors (*)
6. Data Transfer Object Generator (*)
7. Material Design Icon Generator (*)
8. Codota Code Search
9. Code Mirroring with Jimu
(*) Necessary. Should have
-----------------------------------------------------------------------------------------------
With the release of Android Studio 2+ I thought it was time I compiled a new list of plugins to improve and enhance Android’s official IDE.
These focus how to develop apps faster, manage project resources, and create better code.
Installing Plugins
The installation process is the same for all plugins:
Launch Android Studio and open Preferences.
Open the Plugins section. 
Click Browse repositories to load the full list of IntelliJ IDEA Plugins.
Search for the name of the plugin, and click install.
Restart Android Studio after the installation completes.
1. Generate Parcelable Objects
At some point during app development, you will have to deal with Parcelable objects in java. Parcelable objects send data to different components of an application, system components, or other applications installed on the device. When an app needs Parcelables, developers need to build them manually, or can use the Parcelable boilerplate code generation tool to generate an implementation based on fields of the Parcelable class.
2. ADB Commands
ADB Idea aims to speed up the day of an Android developer by giving access to crucial terminal commands. I found this tool helpful after the release of Android Studio 2.0, and the addition of Instant Run. Whilst it’s a great feature, sometimes the quick build doesn’t pick up small changes and you have to rebuild and reinstall the project. This makes quick access to ADB commands invaluable.
3. ADB over Wifi
This is simple plugin that let’s you debug Android apps over Wi-Fi, which is pretty cool if you ask me.
4. Minimap
If you have used editors like Sublime, CodeGlance might be what you need to make your IDE more enjoyable and easier to navigate large class files.
5. Convert SVG to Android Vectors
The mindset change of Material Design bought new approaches towards app icons, logos and static images. Asset formats changed from traditional image formats (.png.jpg, etc …) to Vector Drawables. The SVG2VectorDrawable plugin let’s you convert SVG images to vector drawables (i.e. .xml files) so you can use them as layout drawables.
6. Data Transfer Object Generator
The Data Transfer Object(DTO) generator creates Java classes from a given feed. This plugin is helpful if you are working with REST APIs that return JSON responses, which is the case for most web services. DTO will generate a ‘POJO‘ object from the feed provided. many more:
Here’s an example from their Github project, where you can also find
7. Material Design Icon Generator
To develop apps based on Material Design Patterns you need to add Material Icons, but I find the Material Icons Guide frustrating and needs a lot of work. This plugin helps you build Material Design Icons in a couple of steps.
8. Codota Code Search
If you haven’t heard of Codota, I highly recommend it. If you have a problem with your code, need a solution, or have a bug you haven’t been able to fix, Codota will try to give you a real world solution. Codota is a code search engine that looks for open source code snippets available on platforms such as GitHub, Google Code, and StackOverflow. This makes Codota the perfect tool for fast development.
An example. Search on Codota for something that I know is not so widely used in small Android projects, e.g. the java.util.Observable class.
The result is rated as ‘CodeRank 5’. Now try something like java.util.ArrayList and you will see ‘CodeRank 10’.
Thats the beauty of Codota and with this plugin you can have the power of Codota inside Android Studio.
9. Code Mirroring with Jimu
Debugging apps on real devices can be slow and take considerable time, especially if you are working with UI elements and making frequent adjustments. Jimu Mirror helps minimize development time by presenting previews on devices of layouts that update in real time, even while making layout changes. Jimu Mirror is a great tool to preview Android layouts, custom views and animations on the fly. It’s not open source and not in the IntelliJ plugins repository so you have to download it from their website. This tool is not free, but I think it could be worth it for the time it will save.

Part 01: Meet Android Studio !

Hi guys,

I'm Alex, I've worked on Android since 2012. With my passion, i would like to share some experiences with you, hope it help you somehow :)

Let start with some basic...

To develop Android Application, you need following items:
1. Android Studio
2. Gradle
3. JDK
4. Config environment variables

1. Install Android Studio. 

Download Lastest Android Studio

After downloading, each install package includes lastest android sdk, with installed necessary components

2. Install Gradle
Android Studio is using gradle to config the build process, very useful for multiple apk version, for different device resolutions,
Download standalone gradle will help you faster your build process while offline.

In my opinion, you should use gradle-2.10. Go to the link below and look for version 2.10 at the bottom right of download page.

Download Gradle


After download, unzip it to specific folder. 

3. Install JDK - Java SE Development Kit

Download JDK


4.  Config environment variables

Right click to My Computer and choose Properties > Advanced System Settings > Environment variables... > 
In system variables sections, we add some variables by choose New...
Name: ANDROID_HOME
Value: address to where you install Android SDK like "E:\DevEnvironment\AndroidSDK"

Name: GRADLE_HOME
Value: address to where you install Android SDK like "E:\DevEnvironment\Gradle210

Name: JAVA_HOME
Value: address to where you install JDK like "C:\Program Files\Java\jdk1.7.0_79"

* To take more convenient, take some following steps to run directly some command

Choose Path variable from System variables sections > Edit > add some path to subfolder of installed components

Example: 
C:\Program Files\Java\jdk1.7.0_79\bin;
E:\DevEnvironment\AndroidSDK\platform-tools;
E:\DevEnvironment\gradle-2.2.1\bin;
E:\DevEnvironment\AndroidSDK\tools

each path separated by ( )

5. Check the result
Start > cmd > type 

java -version      => if it show you version of installed JDK, it's ok or you haven't install it yet or haven't add path to Bin folder in JDK folder (C:\Program Files\Java\jdk1.7.0_79\bin)

gradle -version

adb

If all are ok, you've done it ! Ready to start develop Android Application !

If you have any question, please leave your comments below :) Don't be hesitate to contact me
vuongxuanhong@gmail.com